Although creating movement while the camera’s shutter is open seems straightforward, the variations of motion blur that result are as endless as your choice of motion. While the shutter is open, you can move the camera, your position, the subject’s position, or any combination thereof. The movement can be exaggerated or subtle, fast or slow, left or right, up or down, smooth or jerky; you can pan, zoom, rotate—the possibilities go on and on.
BLUR, PAN, AND STOP MOTION
One fundamental way to create motion when photographing a still subject is to move the camera. Using a combination of slower shutter speed and camera movement, you can introduce a motion blur into the image. Depending on the length, direction, and path of the camera movement, the resulting abstraction can create interesting shapes and ghostlike figures.
A common way to freeze the motion of a moving subject in a photograph is to move (track) the camera at the same rate of motion as the subject. For example, when photographing a car going around a racetrack, you would stand in one place, following the car with your camera. This technique is known as panning. Using a relatively fast shutter speed will stop the motion of the subject that you are panning with, but because the camera is moving in tandem with the subject, anything that is not moving at the same speed as the subject is typically blurred. This method is a great way to show the relationship of the subject within its environment.
Although the same panning technique was also used to create the images in Passenger Seat [the book from which this article is excerpted], in this case, the photographer (and therefore the camera) was moving while the landscape (the subject) stayed fixed. The result was that the subject is seen as being motionless while its surroundings are in motion. However, I found that using a relatively fast shutter speed typically won’t create enough motion around the subject to make the image visually compelling. In order to add additional motion, the shutter speed must be slowed down.
The resulting images also turned out completely different based on the distance that the subject was from other foreground or background elements in the scene, the direction and speed of the vehicle, and the motion path of the camera (pan direction and motion path of lens); there was a continuum of “sharpness” and varying degrees of movement throughout the imagery. These images resulted from the unique orchestration of all these variables and the movements within the scene, all while the shutter was open.
It wasn’t always necessary to have a sharp subject in the image. The long exposures recorded movement, patterns, and abstractions that were otherwise invisible.
You can add another variable by zooming the lens while the shutter is open. This technique, often referred to as racking the lens, adds another dimension of motion to the scene, as you can see in the image of the tree in the snow. Personally, I found the effect too jarring—almost to the point of being violent—to fit with the results that I achieved from panning with the subject instead.
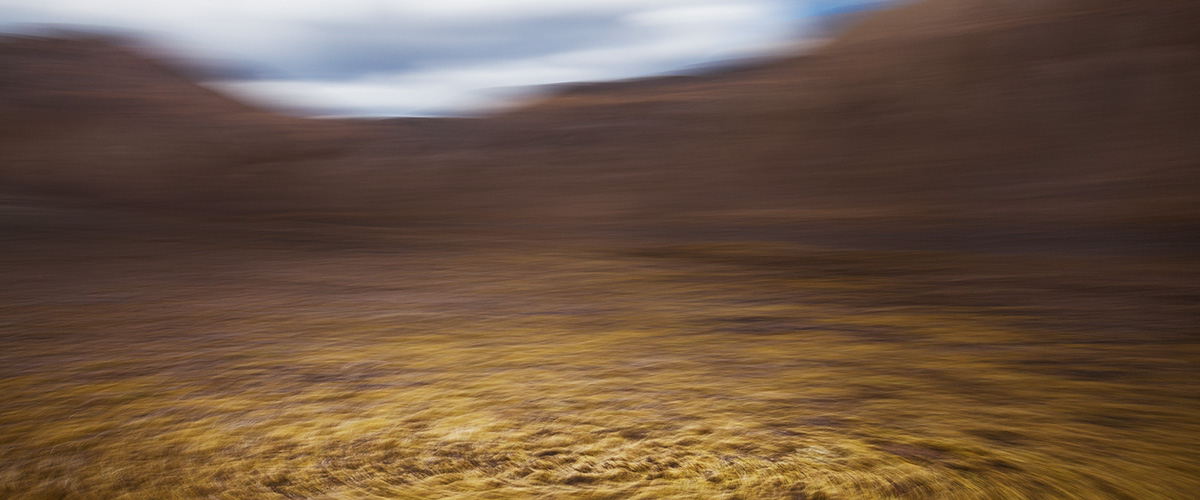
For a softer effect, you can increase your shutter speed and, while the vehicle is in motion, simply hold the camera still to let the camera capture streaks of color from the scene. I found that when I was looking for a more tranquil, peaceful, and moody way to represent a location, this technique worked perfectly. Sometimes color can speak for itself, as you can see.
RHYTHM NOT RULES
It takes a lot of practice—and a lot of luck—to achieve the correct combination of shutter speed, rate of panning, distance between camera and subject, focus, and vehicle speed to get the image that you are looking for. Not to mention the fact that you can’t actually see what you’re capturing when you click the shutter. There are no hard-and-fast rules for drive-by photography.
While I was capturing images for Passenger Seat, many times the camera’s auto-focus selected a different subject than I had hoped for, I failed to pan at the correct speed, or the depth of field was too shallow because the distance between the subject and car changed. It could have been a recipe for complete frustration, but I decided at the very beginning of the project that there was no way that I could actually take credit for these images. They are all gifts, and I am grateful for each and every one of them. And I find that when I’m really present, I get into the rhythm of the car moving through the landscape, like a dance with a variable tempo, and I follow my intuition. Go ahead and try to let go, move forward with a project, and see if it lifts like a kite in the wind. Remember that if you don’t risk anything, you risk everything.
Excerpted from Passenger Seat: Creating a Photographic Project from Conception through Execution in Adobe Photoshop Lightroom and used with the permission of Adobe Press and Peachpit Press.
January 8, 2015
Images Julieanne Kost