
I love to use grainy scatter brushes in my vector projects. Whether they’re illustrations or designs for the web or print, scatter brushes add a more organic feel to the work. In this tutorial, you’ll learn how to make scatter brushes, and to inspire your own projects, I’ll demonstrate how I used scatter brushes in a specific illustration.
I’ve also created five scatter brushes for Adobe Illustrator CC that you can download right now (45MB) if you want to skip the DIY section of the article. Their effects range from subtle to strong. You can also download the final, layered illustration as an .AI file (136MB).
CREATE THE SOURCE ART
To make a spatter that looks like the real thing, I go back and forth between Illustrator and Adobe Photoshop CC.
Beginning in Photoshop, open a new file that measures 4 by 4 inches, has a resolution of 400 pixels, and a color mode of grayscale. Select the Gradient tool, choose Radial, and save the results as a PSD file.
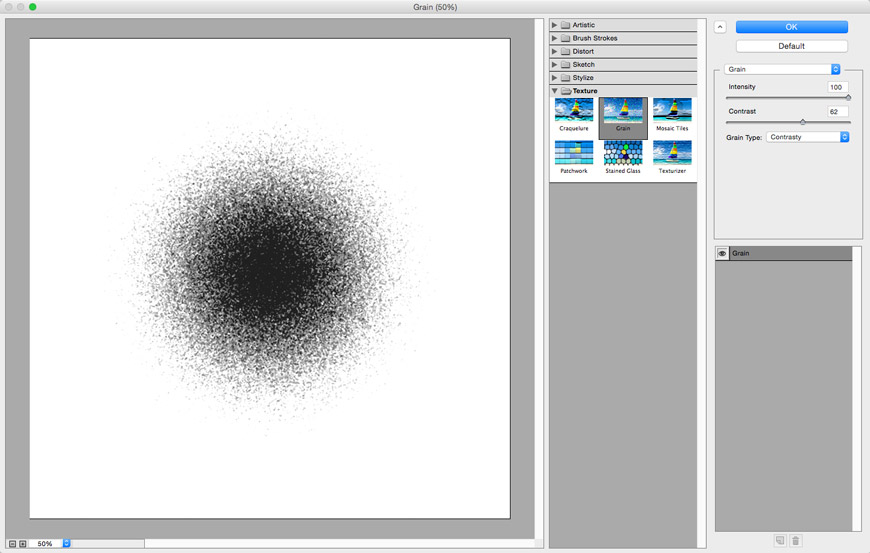
In Illustrator, open the PSD. Select it, open the Appearance panel, and go to fx > Texture > Grain. Set the Grain type to Contrasty, the Intensity to 100, and Contrast to 62.
Save the Illustrator file and open it in Photoshop. Go to Image > Adjustments > Levels. Because you don’t want any midtones, drag the input levels around until you’ve blown out the gray. Finally, use the Clone Stamp tool to add some white specks and break up the solid black. Save as a high-resolution (450 or more ppi) bitmap TIFF.

TURN THE SOURCE ART INTO A SCATTER BRUSH
It doesn’t take long to transform the source art into a scatter brush. Place the TIFF in Illustrator and open the Image Trace panel. (Make sure you can see the Advanced options.) Select the source art and check the Ignore White box in the Image Trace panel so your background remains transparent.
Still in the Image Trace panel, set Noise to 1 and Paths to 100%. (Because you’ll be capturing a lot of detail, the file size will be large, but the aesthetic reward is worth it.) Leave the other settings as is and click Trace. Click Expand in the Control bar to commit to the trace.

Your image is now vector artwork, but it needs a little clean up before it can be a brush. Select the vector art and change it from a group to a compound path by going to Object > Compound Path > Make.
Open the Brushes panel and drag the artwork onto the New Brush button. In the resulting New Brush window, choose Scatter Brush and click OK. That opens the Scatter Brush Options window. Name your brush and select Tints under Colorization.

The key to an effective scatter brush is its customized settings. For this brush, I chose to keep the Size Fixed and the Spacing, Scatter, and Rotation Random. Other art may need different settings. The degree of randomness is controlled by the settings gamut, so take some time to play with those values.
DRAW WITH THE SCATTER BRUSH
To load and use your new scatter brush, select it in the Brushes panel, click the Paint Brush tool, set a stroke size and color, and draw! Have fun experimenting with color, size, opacity, and blend mode.
To help you understand how you might use scatter brushes, let’s look at one of my projects. I call it “In the Zone” because it’s a visual metaphor for how I feel when everything’s clicking.

At this point, the vector artwork looked OK, but I knew that it could improve with the use of scatter brushes.

I drew a glow behind several elements, adjusting the scatter brush opacity to 40%.
The Paintbrush tool isn’t the only way to use scatter brushes. I created a standard path, selected it, and clicked on the scatter brush in the Brushes panel. After Illustrator applied the brush to the path, I increased the stroke size, adjusted the opacity, and set the blend mode. When I was happy, I masked all the paths into a background host shape.


Using another scatter brush from the free set, I drew a loose line that covered the background and set the path to 2pts so that it filled in the entire area with a speckled texture. I adjusted the opacity to 15% and set the blend mode to Multiply. I used the same technique with another scatter brush but set the color to white.
Finally, I added more texture as a top layer, dialing back its opacity so that it’s a more subtle effect.

You curious types should also check out the source file for this illustration for more insight into how I applied the scatter brushes.
September 14, 2016