

Every year, the Pantone Color Institute selects a color to reflect the current cultural climate. For 2018, it’s Ultra Violet, a “provocative and thoughtful” purple that “communicates originality, ingenuity, and visionary thinking.” Who doesn’t want that? In this Photoshop tutorial, you’ll learn how to incorporate the new Pantone Color of the Year into a monochromatic double-exposure effect.
FIND YOUR IMAGES
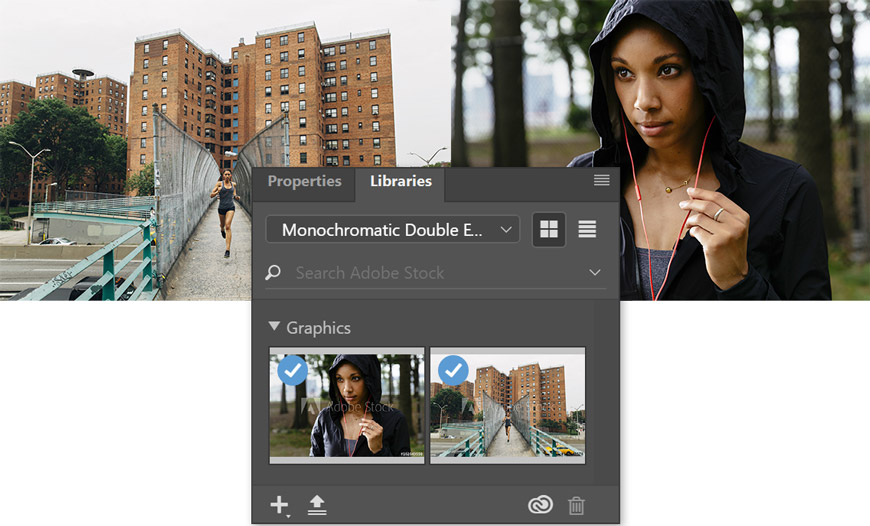
Begin by selecting two images—one for the foreground of the double exposure and one for the background. I chose mine from Adobe Stock’s Galeries Collection (Portrait and Background.) Save the images to your Creative Cloud Library.
SET UP YOUR DOCUMENT
In Adobe Photoshop CC, create a new document. In the Layers panel, make a new group named "Bottom Image" and add a Black and White Adjustment Layer and an Exposure Adjustment Layer (Layer > New Adjustment Layer). Duplicate the group (Command J/Ctrl J) and name the duplicate “Top Image.”

IMPORT YOUR IMAGES FROM THE LIBRARIES PANEL
Open the Libraries Panel (Window > Libraries) and find the Library where you saved your Images. Drag the Background image to the Bottom Image group and the Portrait image to the Top Image group. Both images should be below the adjustment layers in their corresponding groups.
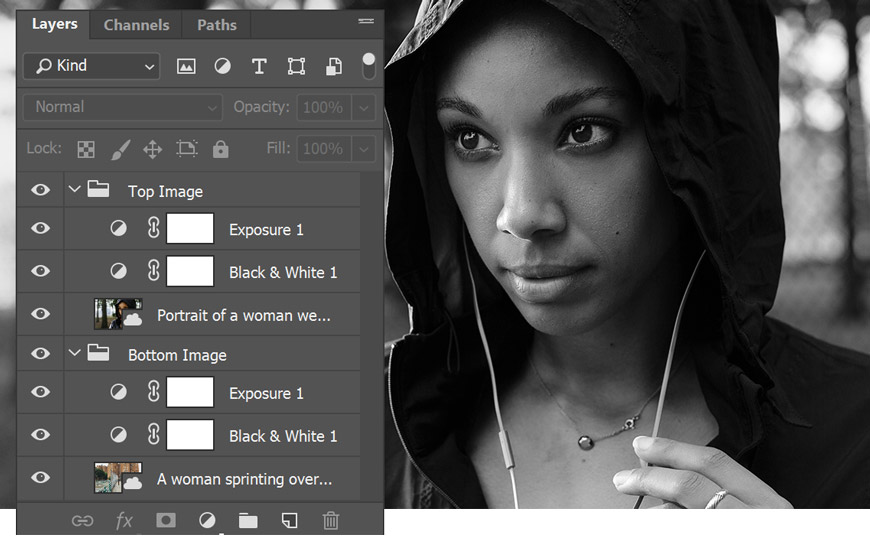
SET THE TOP IMAGE GROUP TO LIGHTEN
Select the Top Image group and set its Blending Mode to Lighten. That tells Photoshop to look all of at the pixels in both groups and keep the lightest pixel. This blend creates the double-exposure effect.

ADJUST THE BLEND WITH THE EXPOSURE ADJUSTMENT LAYER
The Lighten Blending Mode uses luminosity to determine which pixels to keep and which pixel to hide. By changing the exposure (luminosity) of each your top or bottom image, you change how the images blend. Experiment with the Exposure Adjustment Layer of each group to control the blend between the layers.

FINE-TUNE THE BLEND WITH THE BLACK AND WHITE ADJUSTMENT LAYER
The Black and White Adjustment Layer desaturates the layers in each group, but you can also use it to fine-tune the blend between the layers.
With one of the Black and White Adjustment Layers selected, go to the Properties Panel (Window > Properties) and use the sliders to control the luminance of the original colors. By changing their brightness, you hide or show something based on its original color. For example, in the Top Image Group, I used the Red slider in the Black and White Adjustment Layer to control how the visibility of the model’s face. Experiment with these sliders in both groups to get a blend that works for your images.

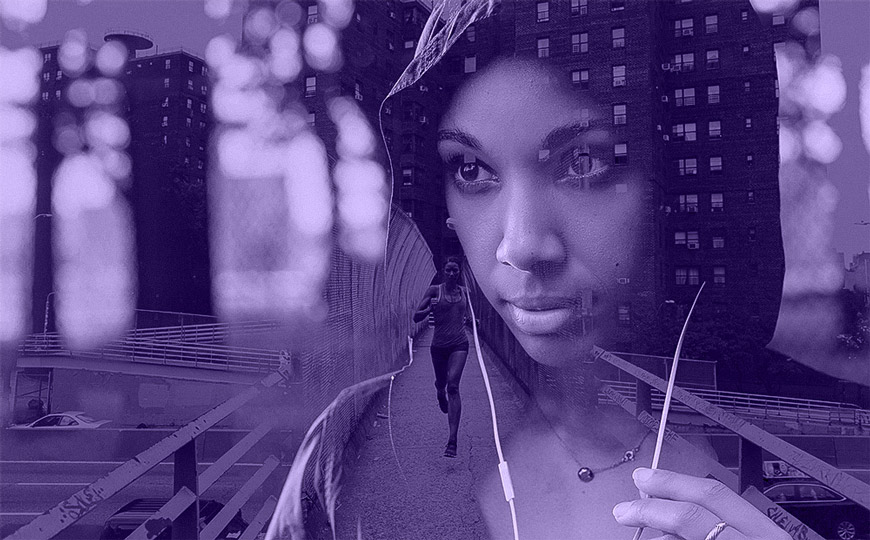
APPLY A COLOR TO THE DOUBLE-EXPOSURE EFFECT
To apply the Pantone Color of the Year, create a new Solid Color Fill Layer (Layer > New Fill Layer > Solid Color), and set the color to #5d4987. Then change the Blending Mode of that Color Fill Layer to Color.

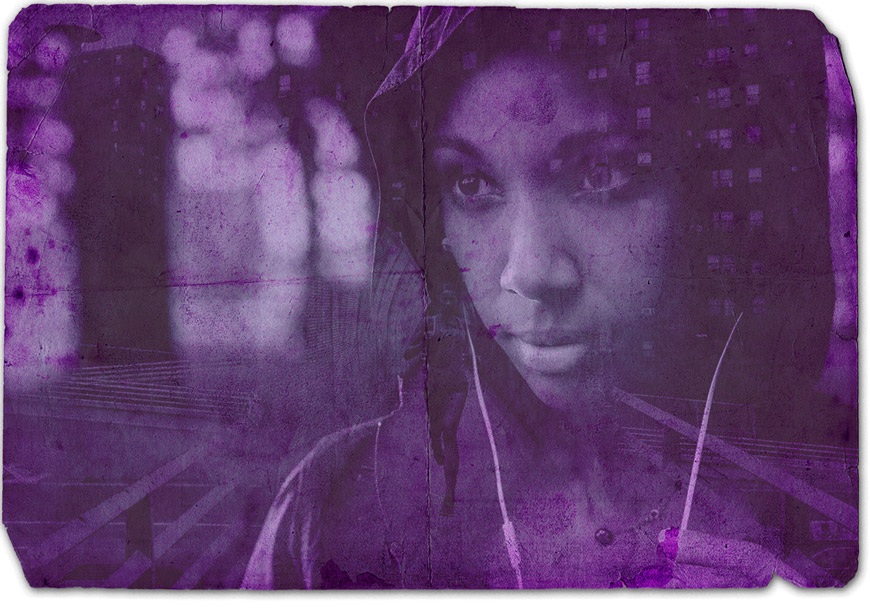
After fine-tuning the adjustment layers and rearranging the positions of the images, this is my final result.
ADOBE STOCK TEMPLATES
To add even more richness to your monochrome double exposure image, place it into a free Adobe Stock template for Photoshop. For my piece, I like the Vintage Photo Effects template:
How did you do with your double exposure? You can share a link to your creations in the Comments section below.
December 8, 2017