Last year was my first time at Adobe MAX, and I felt like the wide-eyed new kid in a crowd of 12,000 MAX veterans. When Adobe Create asked me to share my experience, I did it with tips for first-timers and an accompanying illustration that played my explosive glee against what felt like everyone else’s hip confidence.
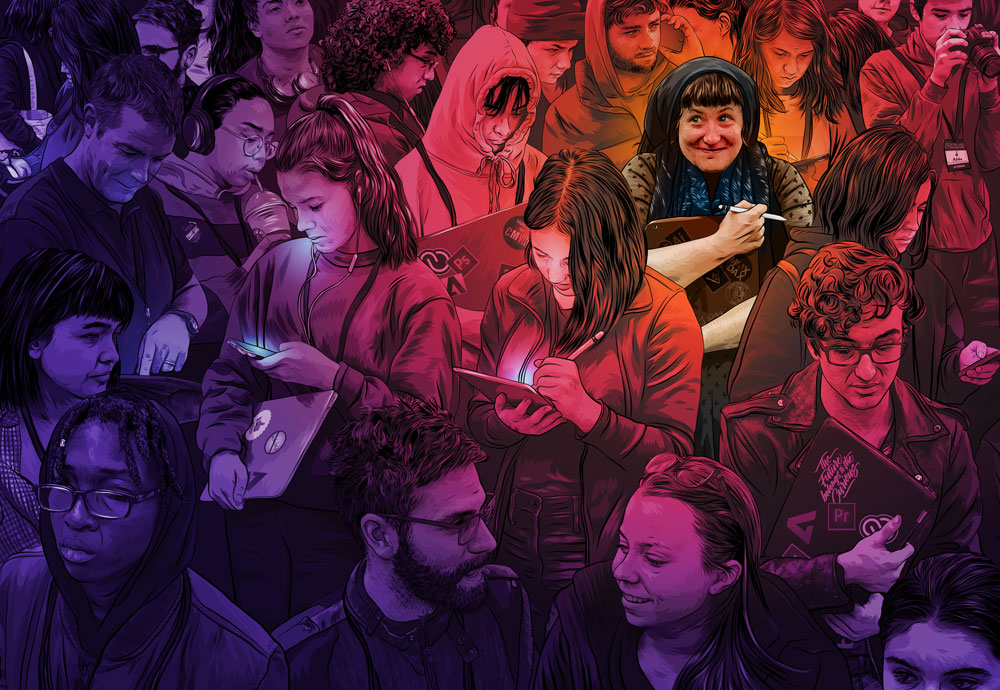
I drew this image for the article "A Newbie's Guide to Adobe MAX."
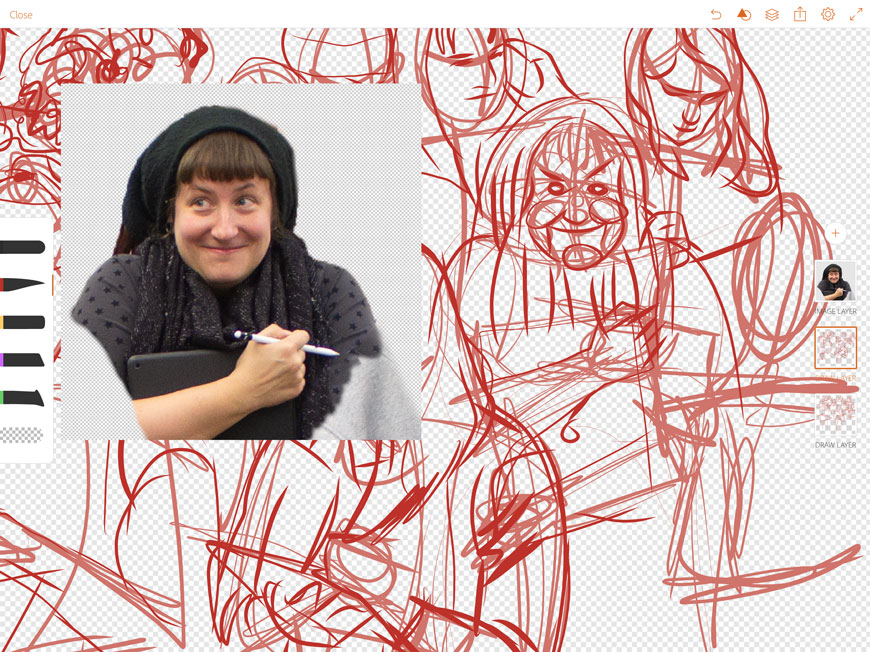
I wanted to capture the vibe of being swept from event to event by the crowd. But first, I needed a crowd. I'm a teacher, and one of the perks is having access to a captive audience. I solicited volunteers at school, chose the best photo of each model, and then opened them in Adobe Photoshop CC and masked each person out of the background.
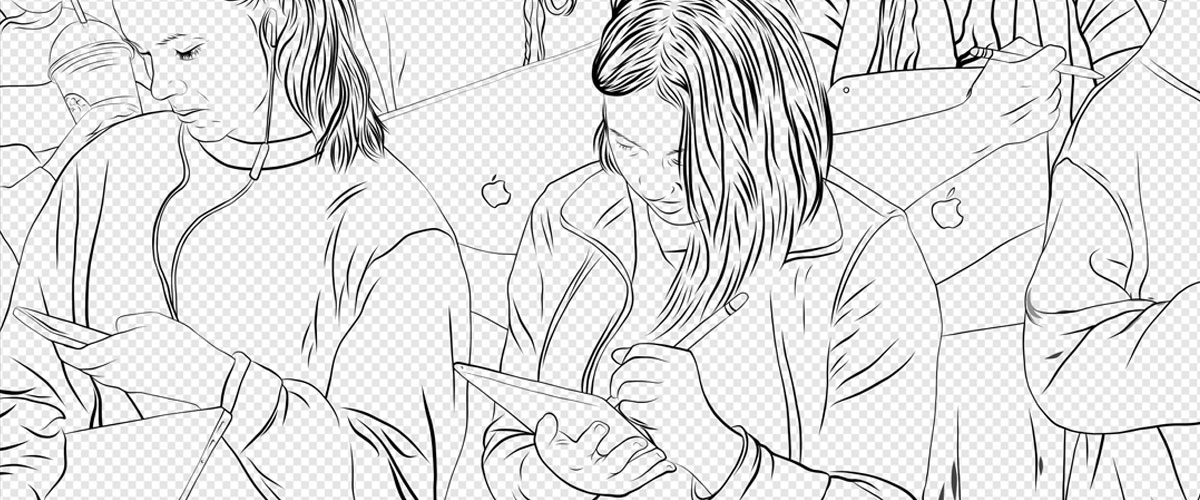
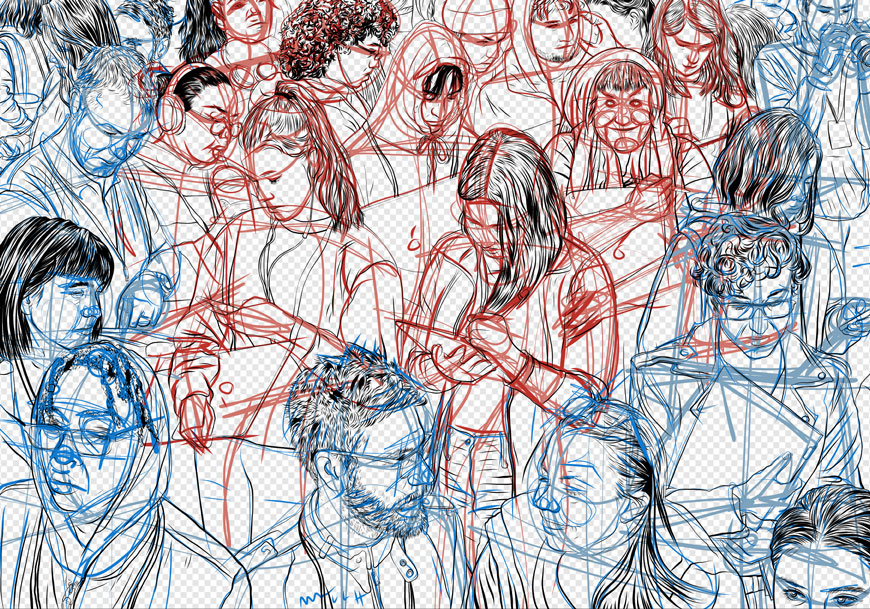
Then I moved them into Adobe Draw on an iPad and sketched with an Apple Pencil. I usually draw out my figures by working alongside the reference so that I can maintain accuracy without straight-up tracing.
I sketched the basic forms in light red, refined them in dark red, and switched to black for the final line drawing. Then I shaded the figures, using separate layers for each value. I worked from dark to light, merging layers whenever I reached the limit allowed by the program.
I flattened the crowd into one layer, then shaded myself. I used more complex textures and stronger contrast in my clothes to help me stand out from the crowd.
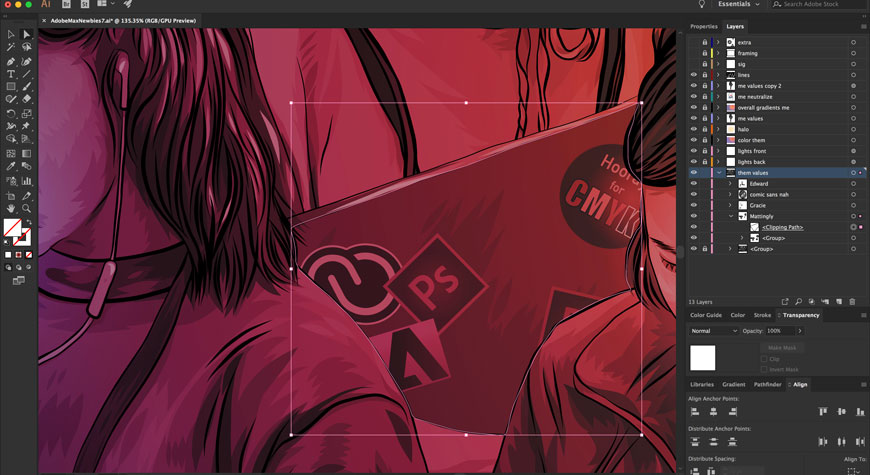
With the crowd fully drawn, I sent the file to Adobe Illustrator CC. Using my Wacom Cintiq, I placed a red, orange, and yellow radial gradient over the whole piece to draw focus to myself and reference the color palette that was everywhere during MAX. I changed the blending mode to Overlay to add pops of color without muddying my shadows.
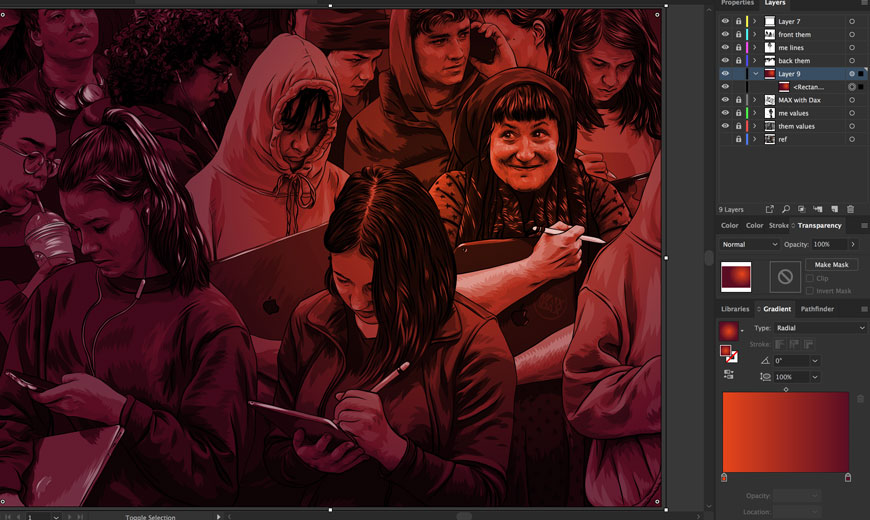
By this point the crowd looked great, but I needed to give myself more dimension. I fixed that by drawing radial gradients over my face and body—green, pink, yellow, blue, and brown for my head and arms, with white to neutralize the color on my dress and hat. I changed the blending mode of these smaller gradients to “color” to shift just the hue and maintain the light and contrast of the overall gradient.
Next, I looked to the swag I got at MAX for inspiration for the decals on the laptops and tablets in the crowd. I used Adobe Capture on my phone to import the two-tone designs with clean lines and drew the designs that had more levels with the pen tool. Then I made clipping masks to hide any areas blocked by the figures.
I texted my retired-art-teacher parents a few screenshots of the figures to get some feedback. I loved the way the drawing looked separated into sections, which inspired me to chop up the crowd drawing into different pieces to distribute throughout the article.
Re-envisioning the drawing meant refining the existing figures and adding more to create a bigger crowd. I took new references from more dramatic angles to fill in the foreground and background and used Draw to sketch the new figures in a draft of the original drawing. I used blue this time so I could stay organized.
After filling in the values, the drawing was so complex that I had to send it to Illustrator layer by layer to keep Draw from crashing. After re-assembling the pieces in Illustrator I resized the gradient and added purple around the edges to give the crowd some depth.
I finished up the drawing by illuminating the gadgets. I drew ellipses and applied radial gradients that faded from cyan at 100% opacity in the center to 0% opacity at the edges and placed them over the devices and the people using them. Then I grouped the gradients according to which face they affected and used clipping masks to shape them to fit each figure. I made the blending mode Hard light at 74% opacity. Finally, I punched up the colors of the overall gradient on the crowd by increasing the saturation.
May 8, 2018