

The web is all about motion these days, so GIFs are ubiquitous. Adding motion to an image can help it tell a more complex story—and Adobe Photoshop makes creating GIFs easy. See how designer and content creator Kendall Plant gives new life to one of her sketches by turning it into a GIF.

With work that incorporates nature, street photography, and even skulls, Kendall Plant is a designer, art director, and content creator who brings her unique creative approach to Adobe as an associate creative director.
Watch Kendall Plant’s GIF-creation process in this quick one-minute video. The steps are written out below.
BEFORE YOU START
Use these sample sketches if you’d like, or practice with your own.
STEP 1: SKETCH IT OUT
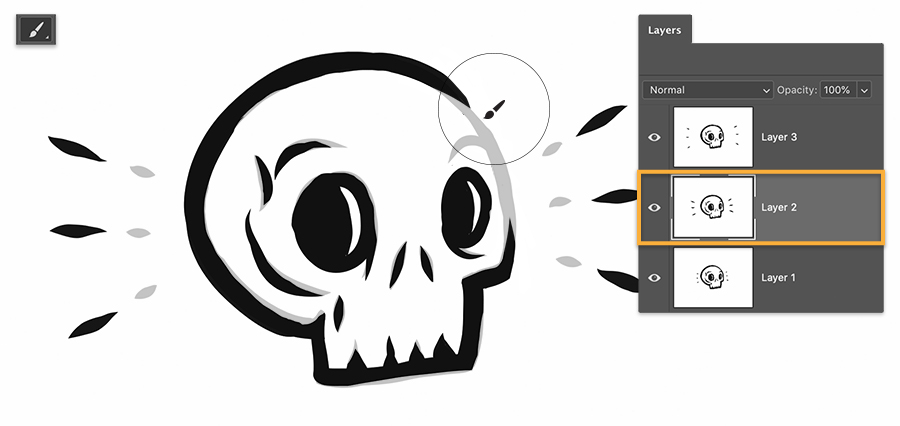
Plant’s first step was creating variations of her initial drawing to show different states of motion and saving each variation as a separate file. Then she opened the first sketch in Photoshop and dragged the remaining files from her computer into the document, pressing return (or enter) to place each file onto its own layer. Next, she clicked on the Lock icon to unlock the original layer.
STEP 2: BRING IT TO LIFE
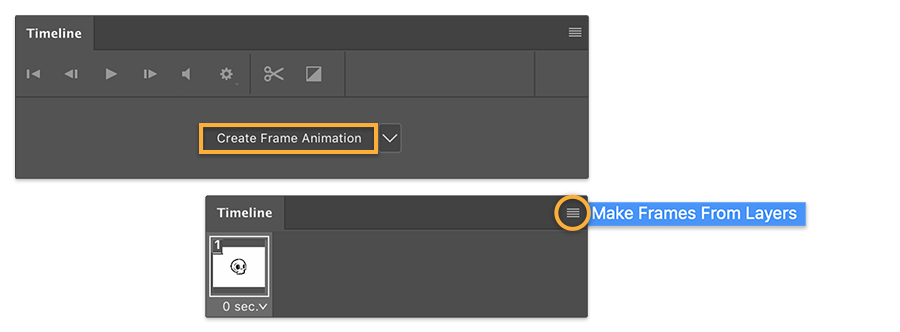
Ready to animate her sketches, Plant opened the Timeline (Window > Timeline), selected Create Frame Animation from the dropdown menu, and chose Make Frames From Layers from the flyout menu. If you have used the Timeline before, it may populate with empty frames by default. If this happens, click on the first frame and hold the shift key while clicking on the last one. Choose Delete Frames from the flyout menu. Then you can choose Make Frames from Layers.
STEP 3: PACE YOUR ANIMATION
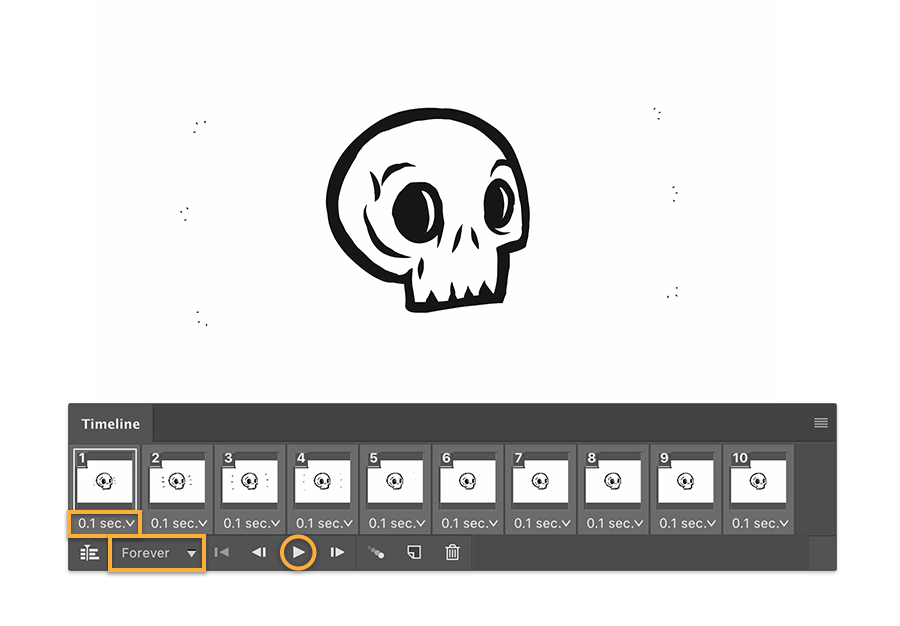
To give each frame the same timing, Plant clicked on the first frame in the Timeline and then clicked on the last frame while holding the shift key. You can click on the down arrow in one frame and set the interval to 0.1 seconds—this will update all of the selected frames. Next, Plant chose Forever from the dropdown menu below the timeline to make the animation loop continuously. You can preview the timing of your animation by clicking on Play.
STEP 4: EXPORT TO GIF
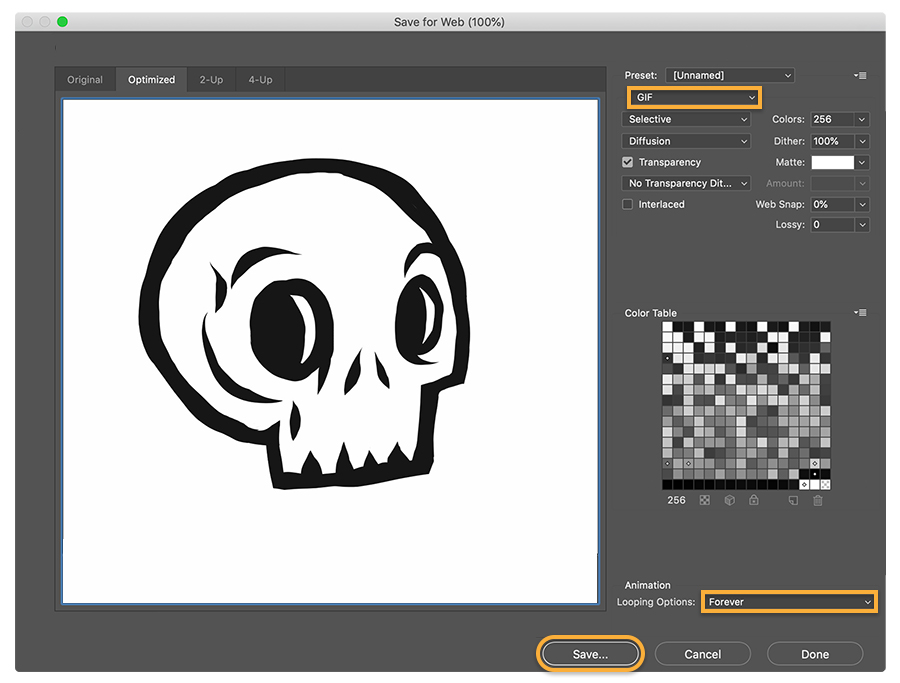
Choose File > Export Save for Web (Legacy). Set GIF as the Export Format and Forever as the Looping Option.
SHARE THE GIF OF ANIMATION
Make your own GIF and share on your favorite social platform or with friends. And keep the creativity moving.
